
Decoding the uv wall printing process: steps, prep, and on-site checklist
Explore uv wall printing process with practical guidance, key questions, and clear next steps before you contact Ink Blend or make a decision.
The uv wall printing process turns a blank surface into a finished mural by combining accurate planning, surface preparation, colour-managed files, and on-site printing with UV-curable inks. If you understand each stage—from your first wall photo to the final cure—you can reduce surprises, make faster decisions, and achieve a clean result that looks intentional at full scale.
What uv wall printing is
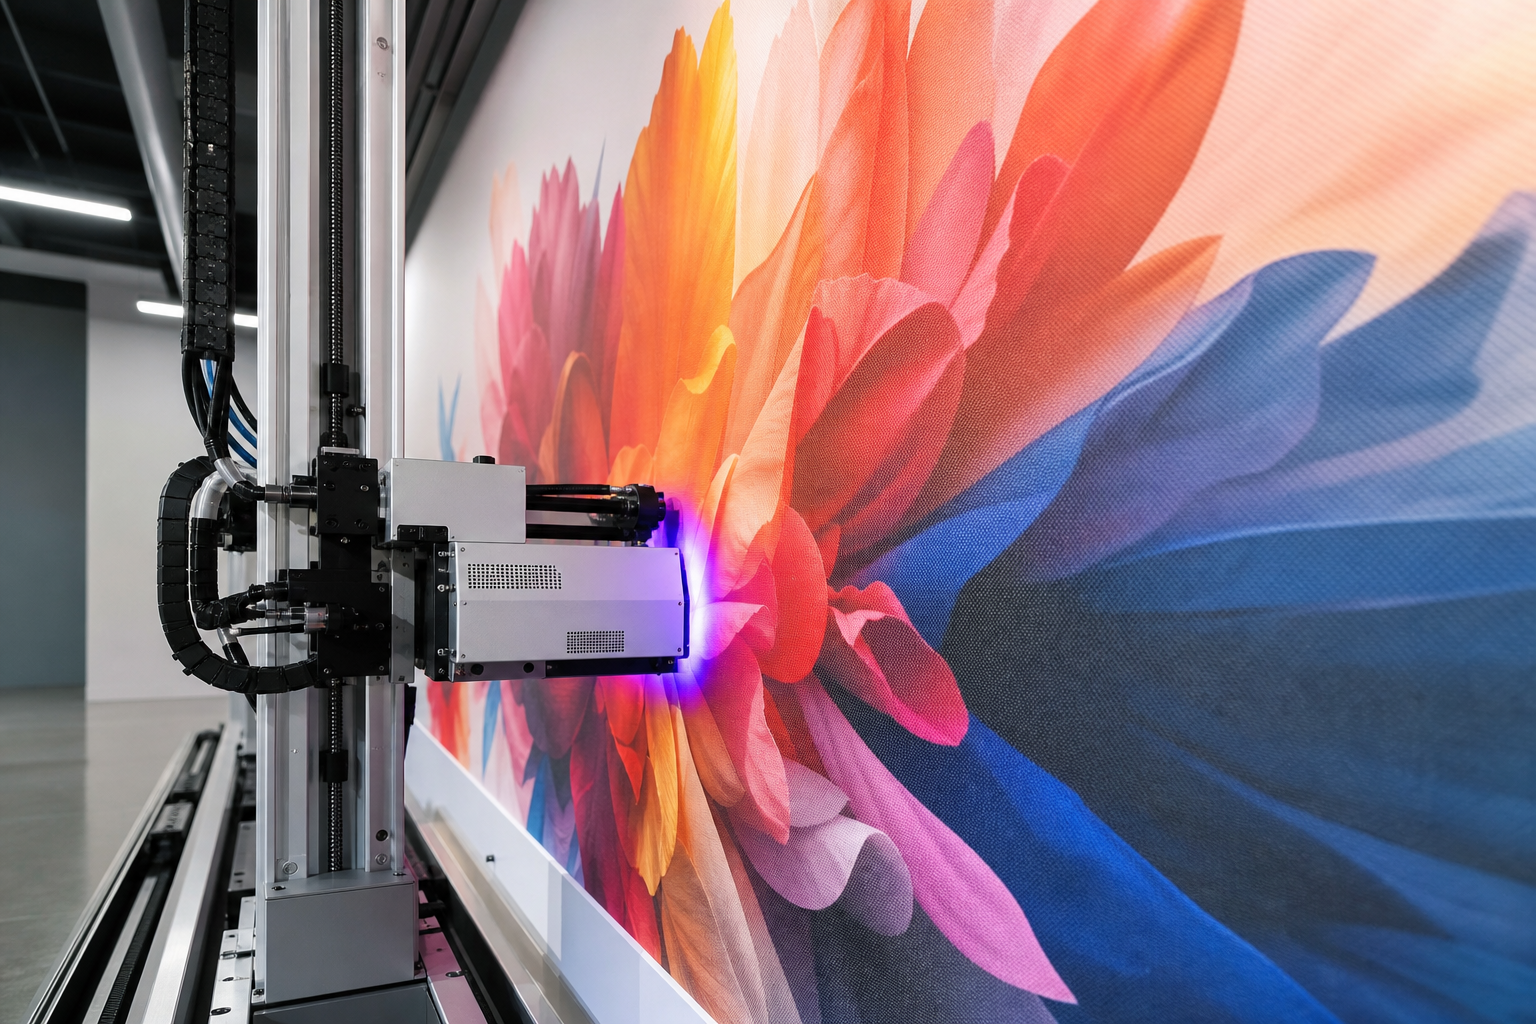
UV wall printing is a direct-to-surface method that applies artwork onto interior walls and compatible surfaces using a specialized printer and UV-curable inks. Instead of printing onto vinyl or paper first, the device moves along the wall and lays down ink in place. Integrated ultraviolet light cures the ink almost immediately after it lands, building crisp detail layer by layer.
This approach is popular for branded feature walls, large murals, and decorative graphics where a seamless, made-for-the-space look is preferred over seams or panels. Because the print happens on the prepared wall, the planning you do up front—measuring, file setup, and layout alignment—matters as much as the print day itself.
Project scoping and artwork decisions
Good outcomes start with a clear scope. Before anyone rolls a printer onsite, lock down the big decisions below.
- Photos and measurements: Capture the full wall straight-on plus angled shots that reveal doors, switches, thermostats, vents, baseboards, bulkheads, or mounted displays. Measure total width and height, then note the exact positions of obstacles relative to a known corner or floor line.
- Use and viewing distance: Reception statements, dining rooms, and corridors are viewed differently. Note where people will stand or sit. This informs artwork scale and how fine detail needs to be.
- Design intent: Pick an approach—photographic, typographic, illustrative, pattern-based, or a hybrid. Decide whether the wall colour will show through or if the design requires a solid background.
- Colour direction: Gather brand colours, reference images, and any do-not-use tones. If a paint colour or finish must be matched closely, record the paint brand and code.
- Edge strategy: Choose how artwork meets ceilings, corners, trims, or millwork. Options include full-bleed, intentional margins, or framing elements.
Once you agree on the concept, build a scale mockup that includes the wall, key obstacles, and a ruler or dimension callouts. Mockups help everyone visualize composition, confirm type legibility, and validate how elements align around switches or trim breaks.
Surface assessment and prep
Direct-to-wall printing depends on a stable, clean surface. The aim is to present a consistent texture that accepts ink evenly and holds up as people occupy the space.
- Cleanliness: Remove dust, grease, and residues. Wipe down and let dry. Any contaminants can interfere with ink adhesion and crisp edges.
- Repairs: Fill holes, skim-coat repairs, and sand patches flush. Feather edges so touch-ups don’t telegraph through fine gradients or lines.
- Texture: UV printing can render on many textures, but deep, inconsistent textures can distort detail. If you want precise typography or thin linework, a smoother, uniform finish is helpful.
- Paint condition: Ensure existing paint is fully cured and not chalking. Fresh paint should be allowed appropriate cure time before printing.
- Masking and protection: Mask adjacent trims and protect floors. Create a clear work zone in front of the wall for equipment movement.
Surfaces vary. What matters most is consistency: a prepared wall that’s smooth enough for the detail you expect, clean enough for ink to adhere, and dry enough to avoid surprises during curing.
File prep and colour management
Because the graphic is printed at architectural scale, file discipline is essential. Follow these practical norms when preparing production art.
- Scale setup: Create artwork at full scale or at a clean fractional scale (for example, 1:10) with clear dimensions. Keep a vector overlay or a separate layer for alignment marks tied to fixed wall references.
- Resolution: For photographic elements, use high-resolution source files. Avoid upscaling low-res assets; softness becomes obvious at wall size and viewing distance.
- Type and linework: Keep critical type and fine lines as vector where possible. If rasterized, ensure enough pixel density for crisp edges at the final scale.
- Colour targets: Provide brand colour references. Where precise matching to surrounding finishes is important, include notes and reference swatches in the handoff to guide on-site adjustments.
- Bleed and margins: If the artwork bleeds to edges, include a modest bleed area. If you’re using margins or frames, define them to a fixed dimension so the installer can verify spacing on site.
- Linked assets: Package fonts and images. Flatten special effects that could render unpredictably, and outline non-system fonts as needed.
Before the print date, review a scaled proof or a cropped test section for critical areas like skin tones, brand reds, or dark gradients. This is also the time to confirm final measurements if any millwork, signage, or electrical plates have moved.
Site readiness and logistics
On a practical level, a smooth print day is about access, reach, and a controlled environment.
- Access and path: Confirm elevator or stair access for the printer, any clearance constraints, and an unobstructed path to the wall.
- Power: Ensure nearby power outlets are available for the printer and curing lamps.
- Lighting: Provide consistent lighting that mimics normal use of the space, so colour and contrast can be evaluated accurately.
- Environment: Aim for a stable, indoor environment within typical room temperature and humidity ranges.
- Staging area: Reserve floor space for equipment setup and for safely moving along the wall.
- Operational windows: Choose a time that minimizes disruptions and vibration near the wall.
On-site printing walkthrough
Here’s how a typical on-site sequence unfolds once the space is prepped and the file is approved.
- Wall verification: Reconfirm measurements, obstacle positions, and the surface condition. Check masking and floor protection.
- Printer setup and calibration: Position the device square to the wall, level vertical rails, and verify nozzle checks. Load the final artwork and set the origin relative to a fixed reference point on the wall.
- Registration test: Print a small alignment target to confirm positioning, scale, and margins. Make micro-adjustments as needed.
- Test swatch: Lay down a small colour bar or a discrete portion of the design in a low-visibility area to validate adhesion and colour appearance under site lighting.
- Production passes: Begin full artwork printing in controlled passes. The printer traverses the wall, depositing UV-curable ink.
- UV curing: Integrated UV light cures inks as they are applied. Operators monitor for uniform curing, banding, or colour shifts and adjust speed and pass count where appropriate.
- Section checks: At natural breaks or after key sections, pause to inspect edge quality, small text, and tonal transitions. Wipe away any dust that may have landed mid-pass.
- Final inspection: Once complete, perform a close-up and a standing-distance review. Confirm alignment around outlets, trims, and ceiling lines.
The operator’s focus is steadiness, registration, and consistency. Minor adjustments during the first few passes often deliver outsized improvements to final quality.
Post-print care and durability
With UV-curable inks, the print is set rapidly, but a conservative approach to early care helps preserve the finish.
- Initial care: Avoid contact while the wall returns to ambient conditions. Keep the area free of tape, cleaners, or scuffs immediately after printing.
- Cleaning approach: For ongoing maintenance, use a soft, dry or lightly damp cloth as appropriate for the wall’s base finish. Avoid harsh abrasives or solvents.
- Add-ons: If the design includes dimensional letters, plaques, or hardware, install them only after the printed area has been cleared for handling.
Durability begins with surface prep and continues with sensible care. A well-prepared substrate and thoughtful daily use are as important as what happens during the print itself.
Common pitfalls and how to avoid them
- Unverified dimensions: Relying on rough measurements can shift layouts over switches or trims. Always confirm final dimensions before print day.
- Last-minute wall work: Painting or patching right before printing may leave residual moisture. Allow proper cure time.
- Low-res assets: Artifacts and pixelation become obvious at scale. Substitute higher-resolution files early.
- Ignoring texture: Delicate linework on heavy texture can look broken. Adjust the design or skim for smoother results.
- Busy adjacent elements: HVAC grilles, sconces, and signage can interrupt key visuals. Use the mockup to move focal points clear of obstacles.
Pre-print checklist
- Wall photographed straight-on and at angles; obstacles marked and measured
- Final dimensions, ceiling height, and baseboard heights confirmed
- Design approved with a scale mockup and alignment references
- Artwork packaged with fonts, linked images, colour notes, and scale
- Surface cleaned, repaired, sanded as needed, and fully cured
- Masking and floor protection in place
- Access, power, lighting, and staging area confirmed
- Operational window booked with minimal nearby vibration
FAQ
How is uv wall printing different from wallpaper or vinyl?
Wallpaper and vinyl are printed separately and then installed, which can introduce seams or require panel alignment. UV wall printing deposits and cures ink directly on the prepared wall, creating a made-in-place look that follows the surface. It’s a good fit when you want a seamless appearance and design control around obstacles.
What surfaces can be considered for uv wall printing?
Many interior walls and smooth architectural surfaces can be considered if they are clean, dry, and stable. Rough, flaking, or highly inconsistent textures can limit detail or adhesion. When in doubt, aim for a uniform finish and confirm with a discrete test swatch on site.
How do I choose artwork that holds up at scale?
Start with high-resolution photography or vector graphics. Keep critical content—logos, headlines, and faces—away from outlets, vents, and corners. Use a scale mockup to verify type size and line thickness from the typical viewing distance. If your wall has noticeable texture, favor bolder lines over hairline details.
Will colours match my brand or paint exactly?
Colour appearance depends on artwork, inks, the substrate, and ambient lighting. Provide brand colour references and note any nearby finishes that influence perception. Reviewing a small on-site test swatch under your actual lighting is a practical way to align expectations before full production.
Do I need to close my space during printing?
You’ll need a clear work zone in front of the wall, stable lighting, and consistent power. Reducing foot traffic and vibration near the wall helps maintain alignment and quality. Plan your operational window based on how the space is used.
Next steps
A practical next step
To discuss the options that apply to your situation, contact Ink Blend and request the relevant details before moving forward.