
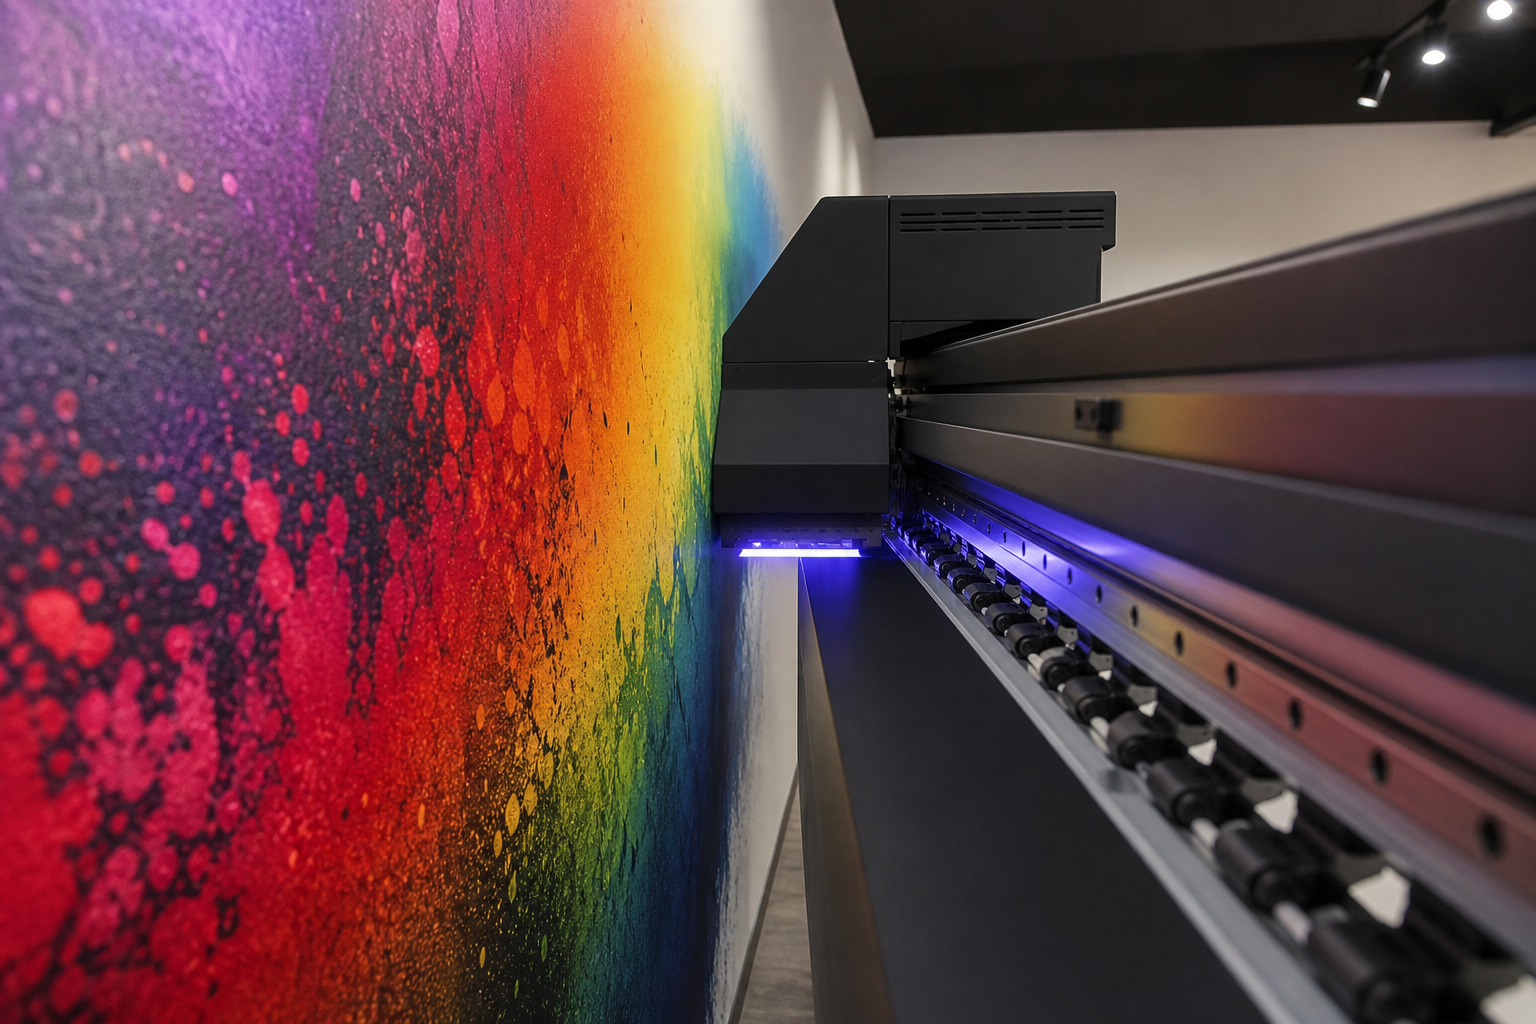
A Practical Guide to Direct-to-wall uv Inks
Explore direct-to-wall UV inks with practical guidance, key questions, and clear next steps before you contact Ink Blend or make a decision.
Direct-to-wall UV inks make it possible to print artwork, branding, and patterns straight onto prepared interior walls without films or wallpaper. This guide explains what these inks are, how UV curing works on architectural surfaces, which walls are good candidates, and the practical workflow—from surface prep and artwork planning to maintenance and troubleshooting—that supports consistent results.
What are direct-to-wall UV inks?
Direct-to-wall UV inks are light-curable inks formulated for printing devices that can position a print head in front of a vertical surface and cure the ink instantly with ultraviolet light. Instead of relying on evaporation or absorption, these inks polymerize when exposed to UV energy, forming a thin, durable film bonded to the wall’s coating or substrate.
Because the ink cures on exposure, it can be laid down on a wide range of prepared interior surfaces, including many painted walls, select plasters and primers, and certain panels. The key to success is matching the surface’s porosity and smoothness to the print system’s capabilities and ensuring proper preparation for adhesion.
- Ink type: UV-curable (often a blend of pigments, oligomers/monomers, photoinitiators, and additives)
- Curing trigger: Ultraviolet light integrated into the printer
- Primary benefits: Fast cure on contact, crisp detail, and the ability to print directly to a prepared surface
- Primary considerations: Surface compatibility, adhesion, texture visibility, and safe operation
How UV curing works on walls
UV-curable inks travel through the print head as fluid micro-drops. As they land on the wall, an onboard UV source activates photoinitiators in the ink. This sets off polymerization, creating a crosslinked coating that encapsulates pigments. The rapid cure minimizes dot spread, which is why fine lines, small text, and high-detail imagery can reproduce cleanly on adequately prepared, smooth walls.
Wall texture still matters. Heavy orange peel, rough plaster, and deep seams can disrupt nozzle-to-surface distance and alter how dots land. While the ink will cure, the perceived sharpness may change because the surface is not planar. Planning print height, head clearance, and artwork scale relative to the texture helps preserve visual intent.
Choosing inks and surfaces
No single ink works for every wall condition. The goal is to align three elements: the wall’s coating or substrate, the primer or sealer used (if any), and the ink set supported by your print system. Always follow your equipment guidance and test a small area to confirm adhesion and color before committing to full-size work.
Typical interior candidates include smooth, fully cured painted drywall; sealed MDF or composite panels; and select plasters or skim coats that have been properly primed. Substrates that remain chalky, oily, dusty, or highly flexible tend to cause adhesion issues. Gloss levels can also influence visual output—satin or eggshell paints often provide a balanced base; very high-gloss may reflect curing light in ways that affect dot placement, and very flat paints may hold dust or chalk residues.
- Good candidates: Smooth, clean, and fully cured interior paints; sealed architectural panels
- Use caution: Freshly painted walls (allow full cure per paint guidance), heavy texture, or surfaces with unknown coatings
- Generally unsuitable: Flaking paint, active moisture, silicone-contaminated areas, or friable plaster without sealing
Surface preparation checklist
Most wall print issues trace back to preparation. A methodical prep routine reduces risk and makes results more predictable. Use this checklist as a planning tool and adapt it to your environment and equipment guidance.
- Wall health check
- Identify cracks, holes, flaking paint, damp spots, or contamination.
- Repair damage and allow patch compounds or skim coats to cure.
- Clean and decontaminate
- Remove dust and debris; wipe with a suitable cleaner that does not leave residue.
- Avoid silicone-based products that can inhibit adhesion.
- Level and smooth
- Lightly sand to reduce orange peel where appropriate; vacuum and tack-cloth after sanding.
- Feather repairs so edges don’t telegraph through the print.
- Prime or seal as needed
- Apply a compatible primer/sealer to unify porosity and stabilize the surface.
- Let coatings cure fully according to their guidance.
- Environmental readiness
- Confirm stable indoor temperature and humidity per your print system’s recommendations.
- Control airflow and dust during printing to avoid contamination.
- Adhesion and color test
- Print a small swatch at the planned settings.
- Evaluate scratch/edge resistance and visual quality after full cure.
Artwork and resolution
Because UV inks cure quickly and hold a dot well, they can support detailed designs—provided the artwork and scale are appropriate for the viewing distance and the wall texture. When planning resolution:
- Match detail to distance: Fine details intended for arm’s-length viewing may be lost on heavy texture. Increase line weights and simplify micro-patterns if the surface isn’t smooth.
- Use high-resolution source files: Vector artwork scales cleanly. For raster images, prepare at a resolution that meets your printer’s guidance for the final size and expected viewing distance.
- Mind tonal transitions: Gradients can show banding on uneven surfaces; add subtle noise or adjust gradient ramps if needed.
- Proof at scale: Even a partial, tiled proof on the actual surface reveals how texture and lighting affect clarity.
Color management and proofing
Wall color and room lighting have a strong influence on how viewers perceive the final print. A consistent color workflow improves predictability:
- Neutral base: A uniform, neutral primer layer can reduce color cast from prior wall colors.
- Device settings: Follow your printer’s recommended profiles and curing parameters for wall substrates.
- Lighting check: Evaluate test swatches under the lighting conditions the wall will actually experience.
- Expectation setting: Provide or review mockups that show scale and general color intent; on-surface proofs anchor expectations to the real environment.
Print setup and registration
Good mechanical setup complements good artwork. Accurate registration, consistent nozzle-to-wall distance, and controlled cure energy all contribute to crisp output.
- Level and square: Ensure the printer’s rails or carriage are level and parallel to the wall plane.
- Head clearance: Maintain the recommended standoff distance; excessive gaps reduce detail and increase overspray risk.
- Tiling strategy: For large murals, plan tile overlaps and alignment marks where they won’t be visible in the final design.
- Cure balance: Too little cure can reduce adhesion; too much can embrittle the ink film. Use settings appropriate for the surface and ink laydown.
Adhesion, durability, and maintenance
UV-cured films are typically hard and abrasion-resistant relative to many conventional inks. Still, the practical durability of a direct-to-wall print depends on the surface integrity, preparation quality, environmental conditions, and day-to-day use of the space.
- Edge vulnerability: Corners and high-contact edges are more prone to impact; consider artwork that minimizes critical details in those zones.
- Topcoats: In some scenarios, a compatible clear coat can unify gloss and offer another layer of protection. Test for compatibility, as some coatings can alter color or cause cracking.
- Cleaning: Use gentle, non-abrasive methods. Test cleaners in an inconspicuous area first to confirm they don’t dull or stain the ink film.
- Touch-ups: Keep original artwork and color references on file for targeted reprints if future maintenance is needed.
Safety and environmental considerations
UV ink systems and curing equipment should be used according to manufacturer guidance, with attention to ventilation, protective measures, and curing light management. This section provides general information only and is not professional safety advice. For workplace safety, consult qualified professionals and follow all applicable guidance for your equipment and materials.
- Ventilation: Maintain appropriate airflow during printing and curing according to your equipment guidance.
- Light control: Shield or manage UV light exposure per the system’s operating procedures.
- Personal protection: Use suitable protective measures as recommended for handling inks and cleaners.
- Waste handling: Dispose of consumables and test panels according to the instructions for your specific products.
Troubleshooting common issues
When results don’t match expectations, work methodically. The following patterns often have straightforward causes:
- Poor adhesion or easy scratching
- Check for surface contamination (silicones, oils, dust) and inadequate cure.
- Confirm full cure of primers or paints used beneath the print.
- Evaluate whether a different primer or sealer is needed.
- Loss of fine detail
- Reduce nozzle-to-wall distance and verify machine leveling.
- Increase artwork line weights or simplify micro-details on textured walls.
- Adjust pass count and curing balance if recommended by your workflow.
- Proof on the actual wall under final lighting; adjust profiles or target values accordingly.
- Verify that underlying paints or primers are neutral and uniform.
- Unify the wall with a consistent base coat; consider a compatible clear finish after testing.
- Balance ink laydown so large solids don’t produce patchy sheen.
Planning and decision framework
Use this step-by-step framework to evaluate a wall project and reduce surprises:
- Define use case and viewing distance
- Brand wall, decorative mural, or informational graphic?
- Typical viewer distance and critical detail zones?
- Assess the wall
- Texture level, integrity, and prior coatings?
- Any moisture, movement, or contamination risks?
- Plan surface preparation
- Repairs, sanding, cleaning, and primer/sealer choices.
- Time allowances for full cure of coatings.
- Prepare artwork and color targets
- Vector where possible; adequate raster resolution for scale.
- Mockups and on-surface swatches to confirm color and legibility.
- Confirm print logistics
- Printer access, clearances, and tiling plan.
- Environmental controls (lighting, temperature, cleanliness).
- Execute a test print
- Evaluate adhesion, detail, and color after full cure.
- Adjust settings or prep steps before final production.
- Print and maintain
- Capture final settings and swatches for future reference.
- Provide simple care instructions for the space.
FAQ: Direct-to-wall UV inks
Do direct-to-wall UV inks work on any paint finish?
They can print on many prepared interior paints, but not all finishes behave the same. Very glossy or contaminated surfaces can reduce adhesion, and very flat paints may hold dust or chalk. Always clean, prime or seal as appropriate, and run an adhesion test on the actual wall before production.
How long should I wait after painting before printing directly on the wall?
Allow the paint or primer to fully cure according to its guidance before printing. Printing on coatings that have not cured can trap solvents or moisture and affect adhesion and color.
Will wall texture show through the print?
Yes. UV ink forms a thin film that conforms to the surface. Light textures may add character; heavy textures can soften fine details. If high precision is critical, reduce texture through preparation or adjust artwork scale and line weights.
Can I clean a wall printed with UV inks?
Use gentle, non-abrasive cleaning methods and test any cleaner on a small, inconspicuous area first. Harsh chemicals or aggressive scrubbing can affect the ink film or the underlying coating.
Do I need a clear coat over a UV wall print?
Not always. Some projects benefit from a compatible clear finish to unify gloss or add a protective layer, but it should be tested for color shift and flexibility before full application.
Next steps
A practical next step
To discuss the options that apply to your situation, contact Ink Blend and request the relevant details before moving forward.