
Surface Graphics for Interiors: How to Choose, Plan, and s s
Learn how surface graphics for interiors work, compare UV printing with vinyl and paint, and plan a Brampton installation with mockups and prep.
Last updated: October 2026
Key takeaway:Surface graphics for interiors are custom visuals applied to walls and other prepared surfaces to support branding, wayfinding, or atmosphere. For many Brampton commercial spaces, direct-to-wall UV printing provides detailed, seam-free artwork with a planning process built around wall photos, scaled mockups, approvals, and coordinated installation.
By Ink Blend
- What surface graphics for interiors are
- Where interior graphics create value
- How UV printing compares with vinyl and paint
- How to plan a surface graphics project
- How to prepare for installation
- Planning an installation in Brampton
- Frequently asked questions
- Request a project assessment
What Are Surface Graphics for Interiors?
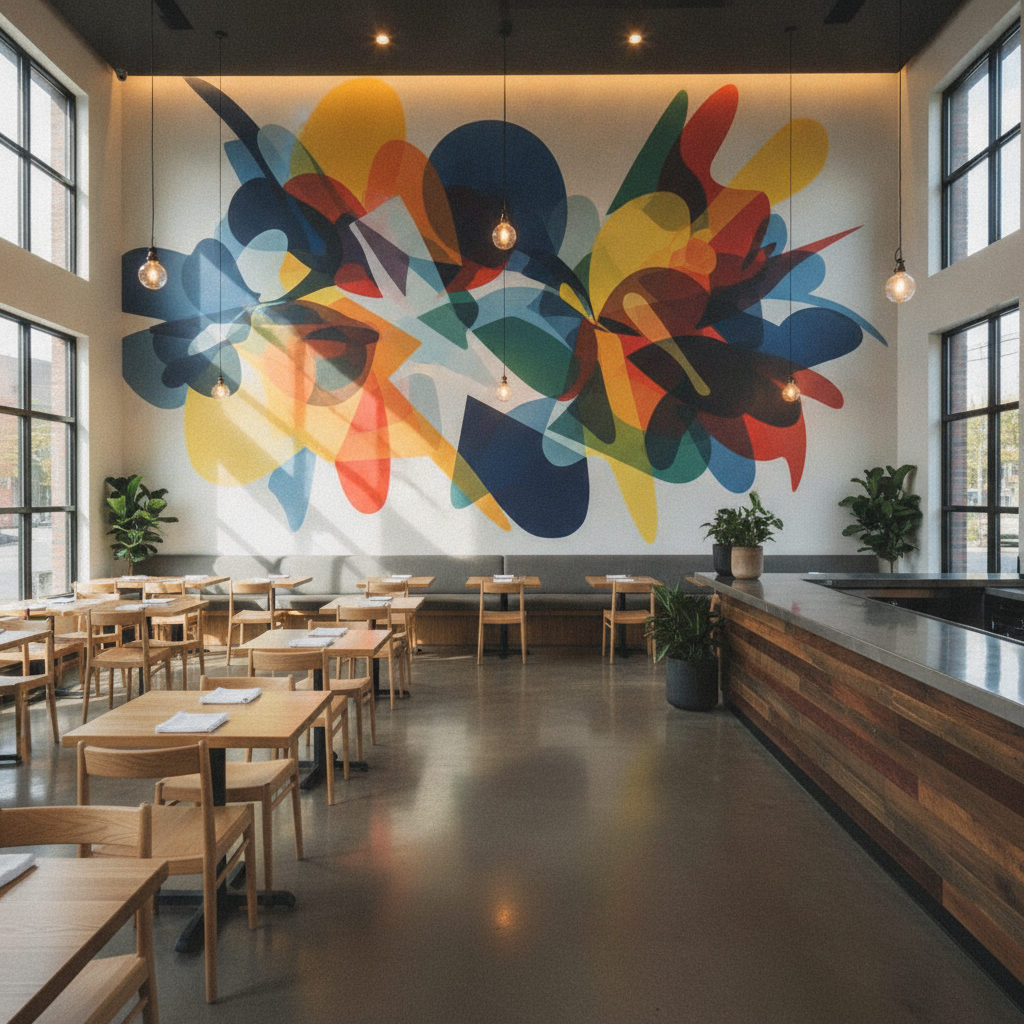
Surface graphics for interiors are designed visuals applied to walls or other architectural surfaces inside a building. They can include logos, photography, illustrations, patterns, typography, murals, directional information, or a combination of these elements. The purpose may be decorative, practical, or both: a reception wall can introduce a brand, while a corridor graphic can help visitors understand where to go.
Unlike a loose piece of artwork, an interior surface graphic is planned for a particular wall, room, viewing distance, and operating environment. The composition needs to account for doors, millwork, outlets, furniture, lighting, sightlines, and the way people move through the space. That is why a wall photo and accurate measurements are useful before artwork is finalized.
Ink Blend approaches these projects as a combination of visual direction and production planning. The studio provides UV wall printing, custom murals, commercial branding, and large-format surface printing for clients in Brampton, the Greater Toronto Area, Ontario, and custom projects across Canada. A typical project moves from discovery to a wall-specific concept, scaled mockup, approval, and coordinated installation.
What makes a strong interior graphic
- A clear purpose: Decide whether the wall should welcome visitors, communicate culture, guide movement, support a product story, or create a focal point.
- Artwork suited to the viewing distance: Logos and small text need different treatment from a photographic mural viewed across a lobby.
- A layout designed for the actual wall: Important faces, words, and symbols should not disappear behind furniture, doors, or fixtures.
- A compatible surface: Smooth, clean, stable, and fully cured coatings generally provide a better basis for direct printing.
- An agreed approval process: A scaled mockup gives stakeholders an opportunity to confirm composition and scale before print day.
Interior graphics can be produced through more than one method. Direct-to-wall UV printing is suited to detailed artwork printed on a prepared surface. Vinyl can be useful where removability or planned creative changes matter, while a hand-painted mural may be the better fit when visible brushwork and an artist-led finish are central to the brief.
Where Interior Surface Graphics Create the Most Value
The strongest location is not always the largest wall. A smaller wall at an entrance, reception desk, dining area, or waiting point may receive more attention than a large surface that people pass without stopping. Begin by identifying where visitors make decisions, wait, orient themselves, or naturally take photographs.
Restaurants and cafés
A feature wall behind a host stand, banquette, counter, or seating area can establish the atmosphere before a guest reads the menu. Illustrations, local references, ingredient imagery, and brand typography can be combined into one composition rather than scattered across separate signs. The design should leave practical clearance around furniture, service equipment, and high-contact areas.
Offices and professional workplaces
Reception graphics can make the first visitor interaction more immediate, while culture walls can communicate values, milestones, or the organization’s story. Graphics in corridors and near meeting rooms can also support navigation when they use a consistent visual system. For offices, consider glare, desk placement, camera backgrounds, and whether the wall will be viewed by staff, visitors, or both.
Retail, salons, and customer-facing studios
Retail and personal-service spaces often benefit from graphics near product displays, consultation zones, or areas where customers pause. A well-positioned pattern or brand story can support the experience without competing with merchandise and mirrors. Artwork should be reviewed at the same height and angle at which customers will see it, particularly when the wall is intended to appear in social content.
Hotels, condominiums, and amenity spaces
Lobby walls, elevator corridors, fitness rooms, lounges, and shared amenity areas can use graphics to give otherwise transitional spaces a stronger identity. Repeated motifs can connect several floors or rooms, while a single large mural can give a lobby a memorable focal point. The project brief should identify furniture, signage, access restrictions, and any building requirements before production begins.
Homes and custom interiors
Residential applications may include children’s rooms, media rooms, stairways, home offices, and feature walls coordinated with millwork or lighting. The design can be highly personal, but the same production fundamentals apply: confirm the substrate, check the artwork at final scale, and plan around fixtures that cannot be moved.
For projects that need a more decorative or architectural direction, Ink Blend’s interior design graphics service provides a relevant starting point for discussing patterns, murals, and branded environments.
How UV Wall Printing Compares With Vinyl and Painted Murals
There is no single best method for every interior. The right choice depends on the desired appearance, wall condition, expected lifespan, ability to make future changes, and whether the design calls for a printed or hand-created finish.
Decision factor Direct-to-wall UV printing Vinyl graphics Painted mural Visual result Detailed photographic, illustrated, or typographic artwork printed directly on the wall Detailed graphics applied as one or more adhesive panels Hand-painted variation, texture, and visible brushwork Seams No wallpaper-style panel seams on a suitable wall Large designs may require panel alignment No printed panel seams Changeability Best considered a semi-permanent or permanent treatment Often the practical choice for planned replacements or leased spaces Changes generally require repainting or a new treatment Best suited to Feature walls, reception statements, brand imagery, and detailed murals Temporary campaigns, repositionable messaging, and some leased environments Artist-led pieces where brush texture is part of the briefWhen direct-to-wall UV printing is a strong fit
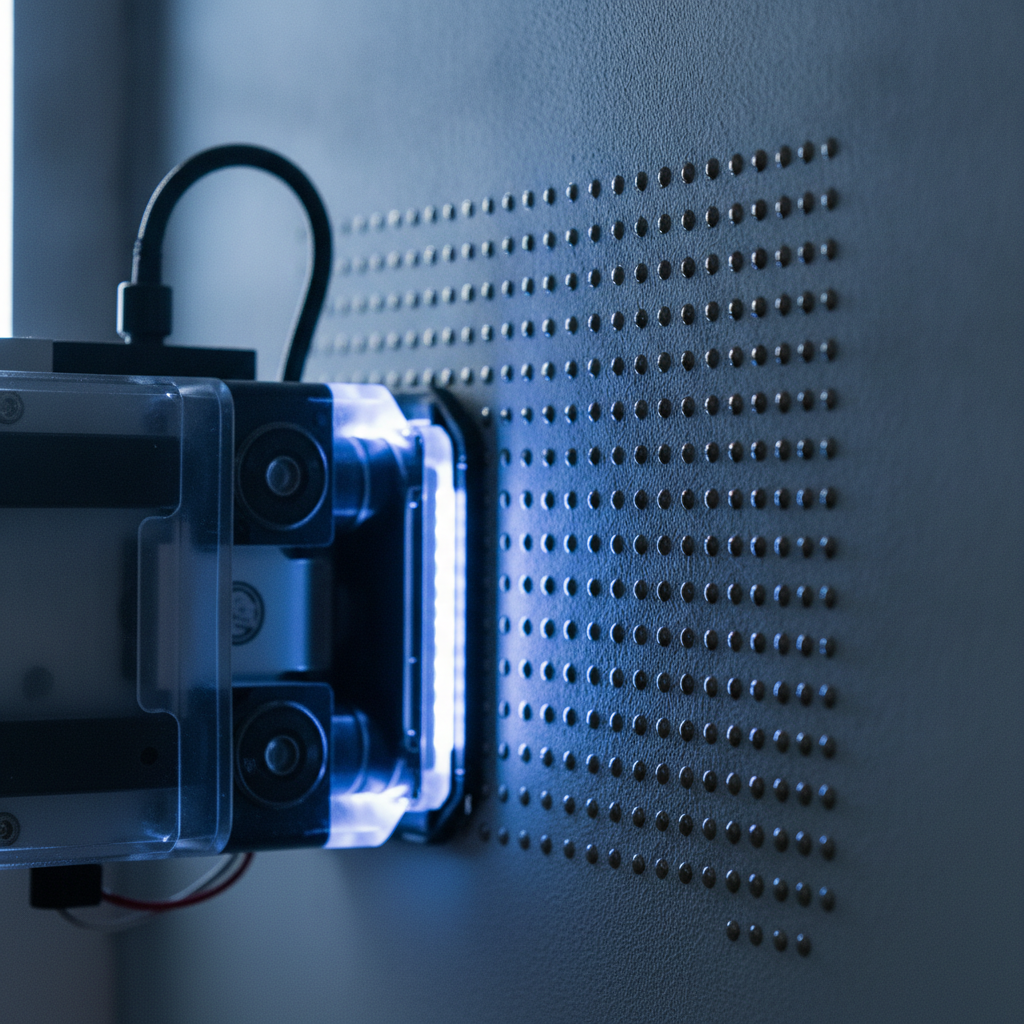
UV wall printing is a strong option when the design depends on fine detail, photographic imagery, precise logos, or a seamless composition across a prepared wall. The artwork is printed directly onto the surface, and UV-LED curing sets the ink as the printer moves across the wall. This approach can reduce the need for separate printed panels and supports a controlled, mockup-led workflow.
It is not a substitute for surface preparation. High-gloss or silicone-rich coatings, heavy texture, dust, damage, and uncured paint can affect adhesion or edge quality. A site review or clear wall photos help determine whether light patching, sanding, cleaning, or a compatible primer and paint system should come first.
When vinyl or paint may be the better decision
Choose vinyl when the client expects seasonal campaigns, future removal, or frequent creative changes. It can also be appropriate where a landlord or facility manager needs a reversible treatment, although the wall condition and removal process still need to be considered.
Choose a painted mural when the visual language depends on individual brushwork, hand-mixed colour, or an artist’s physical process. A painted treatment may require more time on site and more coordination around drying, but that visible craftsmanship can be the primary value of the project.
Ink Blend’s UV wall printing service can help evaluate whether direct printing suits the wall, artwork, and operating schedule. For broader material and format discussions, the large-format surface printing service covers related surface applications.
How to Plan a Surface Graphics Project
A reliable project begins with information that allows the artwork and installation plan to be judged in context. Sending only a logo or a rough wall size may be enough for an initial conversation, but it is rarely enough to confirm composition, access, or readiness.
1. Define the wall’s job
Write down what the graphic should accomplish and who will see it. “Make the lobby feel more welcoming,” “help visitors find meeting rooms,” and “create a branded photo backdrop” lead to different layouts and content decisions. Also identify what must remain visible, such as a reception desk, safety sign, product display, or door.
2. Send useful wall information
Provide a wide photo, a straight-on photo, the wall width and height, and the approximate position of doors, outlets, fixtures, and permanent furniture. Include the surface type and note any damage, texture, gloss, recent painting, or access restrictions. Several clear photos are more useful than one tightly cropped image.
3. Supply production-ready brand assets
Vector logos and outlined or live vector text are useful for crisp reproduction. For photographic or raster artwork, the file should be suitable for the intended final size; the exact requirement depends on the image, viewing distance, and composition. Brand colour references, typography rules, and examples of approved usage help prevent avoidable revisions.
4. Review a scaled mockup
A scaled mockup places the proposed artwork on the actual wall photo and shows how it relates to the room. Review the position of important faces, headlines, logos, and visual focal points, not just the artwork in isolation. If several stakeholders are involved, appoint one person to collect feedback and provide the final approval.
5. Confirm the installation window
Discuss access, parking or loading, elevators, power, floor protection, furniture movement, building rules, and the preferred work hours. Restaurants, retailers, and offices may prefer before-open, after-close, or otherwise quiet periods. The earlier these constraints are known, the easier it is to coordinate a practical installation.
6. Approve the final scope
Before print day, confirm the approved artwork, wall dimensions, location, access plan, and any preparation that the client or installer must complete. A clear approval reduces the risk of printing an outdated file or arriving to a wall that is not ready. It also gives the installation team a shared reference for the final walkthrough.
How to Prepare the Wall Before Installation
Surface preparation has a direct effect on the finished graphic. The wall should normally be smooth enough for the desired detail, free of dust and residue, and fully cured. Small defects can become more visible once a large image or solid colour is printed across them.
Wall-readiness checklist
- Repair holes, dents, cracks, and loose areas before the installation date.
- Reduce heavy texture when the design requires fine lines, small type, or crisp photographic detail.
- Remove dust and debris, especially around corners, trim, and floor-level areas.
- Confirm that recent paint or primer has fully cured and is compatible with the intended treatment.
- Identify high-gloss, silicone-rich, contaminated, or otherwise unusual coatings for review.
- Move or protect furniture and remove fixtures that would obstruct the print path.
A prepared drywall or painted plaster wall is often a practical starting point, but other interior panels, sealed wood, and similar surfaces may also be considered after review. Do not assume that two walls with the same paint colour have the same print suitability; coating age, sheen, texture, and cleanliness can differ significantly.
What the client should coordinate
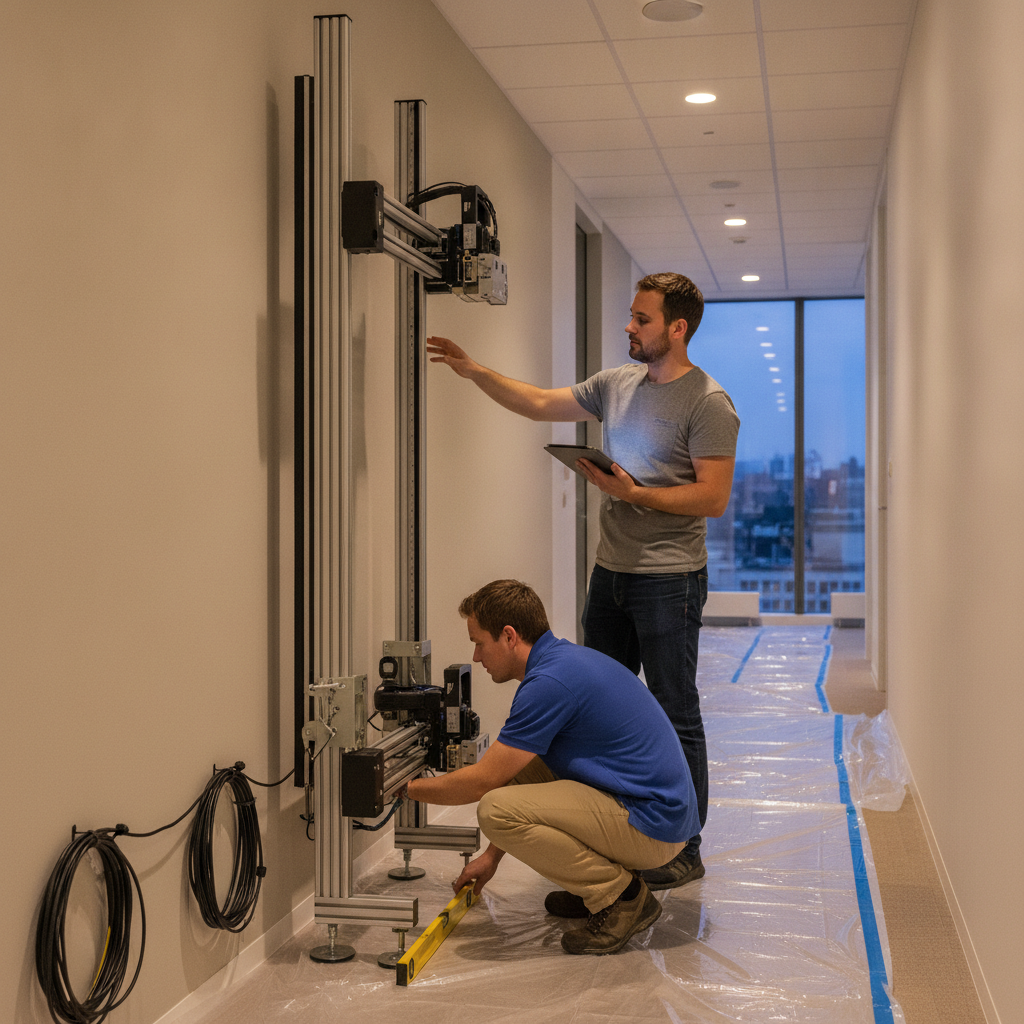
Provide clear access from the loading point to the wall, reserve building access when needed, and communicate any security, noise, insurance, or work-hour requirements. Keep a decision-maker reachable during the installation window in case an unexpected condition affects placement. Floor protection, cable routing, and cleanup should be discussed as part of the scope rather than left to the final day.
Planning Surface Graphics Installation in Brampton
For Brampton projects, the practical challenge is often coordinating the wall treatment with a live business rather than choosing the artwork alone. Restaurants and retailers may need to keep customer paths open, while offices may have meeting schedules, shared corridors, or building access rules to work around.
During quoting, share the preferred quiet hours and any deadline connected to an opening, renovation, event, or tenant handover. A photo-based assessment can help establish the wall dimensions, surface condition, and likely preparation needs before a site visit or installation is scheduled. Ink Blend serves Brampton and the surrounding regional market, including Toronto, Mississauga, Vaughan, Markham, Oakville, Hamilton, and Kitchener.
Seasonal conditions can also affect planning. Winter work benefits from a stable, enclosed interior environment, while busy event periods can reduce scheduling flexibility. These are coordination considerations rather than reasons to postpone a project: early measurements, approved artwork, and a confirmed access plan make the installation easier to organize.
For a related branded-wall direction, review Ink Blend’s commercial branding service. If the project calls for a more bespoke decorative statement, the custom wall mural service offers another route for developing the visual concept.
What the Ink Blend Workflow Looks Like
The workflow is designed to reduce uncertainty before equipment arrives on site. Each stage answers a different project question: what is needed, what will it look like, is it approved, and can it be installed safely and neatly?
- Discovery: Share the wall photos, measurements, intended use, artwork direction, surface information, and operating constraints.
- Concept development: Establish the composition, imagery, colour direction, scale, and relationship to the surrounding room.
- Scaled mockup: Review the proposed treatment on the actual wall photo, including the position of major design elements.
- Approval and scheduling: Confirm the final artwork, access arrangements, preparation responsibilities, and installation window.
- On-site printing: Protect the work area, position the equipment, print directly onto the prepared surface, and monitor the result.
- Walkthrough: Review the completed wall, confirm cleanup, and identify any remaining client-side steps.
Ink Blend’s print process overview provides additional context for the stages involved. The most useful preparation is still a complete brief: a good workflow cannot compensate for missing dimensions, inaccessible walls, or artwork that has not been approved at the correct scale.
Frequently Asked Questions
What are surface graphics for interiors used for?
They are used to express brand identity, create feature walls, support wayfinding, communicate information, and shape the atmosphere of an interior. Common settings include restaurants, cafés, offices, retail spaces, hotels, condominiums, amenity rooms, and homes. The best application depends on the wall’s visibility, the audience, and the job the graphic needs to perform.
What surfaces can receive interior UV wall printing?
Prepared drywall, painted plaster, sealed wood, and some interior panels may be suitable. The surface should be stable, clean, smooth enough for the required detail, and fully cured. Wall photos and measurements allow the project team to identify potential issues such as heavy texture, gloss, damage, or incompatible coatings before installation.
Is UV wall printing better than vinyl for a feature wall?
It can be the better choice when the priority is detailed, seam-free artwork printed directly onto a prepared wall and the treatment is expected to remain in place. Vinyl is often more practical when removability, seasonal replacement, or a leased-space requirement is important. The decision should be based on the wall, lifespan, artwork, and future change plan rather than on one method being universally superior.
What should I send when requesting a quote in Brampton?
Send wide and straight-on wall photos, width and height measurements, the surface type, the intended use, artwork or brand assets, and any access or timing constraints. Mention doors, outlets, furniture, recent painting, texture, and preferred before-open or after-close hours. This information helps establish a realistic concept, preparation path, and installation plan.
Request a Project Assessment
Surface graphics for interiors work best when the visual idea and the installation conditions are planned together. Send Ink Blend a photo of the wall, its measurements, and a short description of the desired result to begin a mockup-focused conversation for your Brampton or regional project.
Contact Ink Blend about your interior surface graphics project.